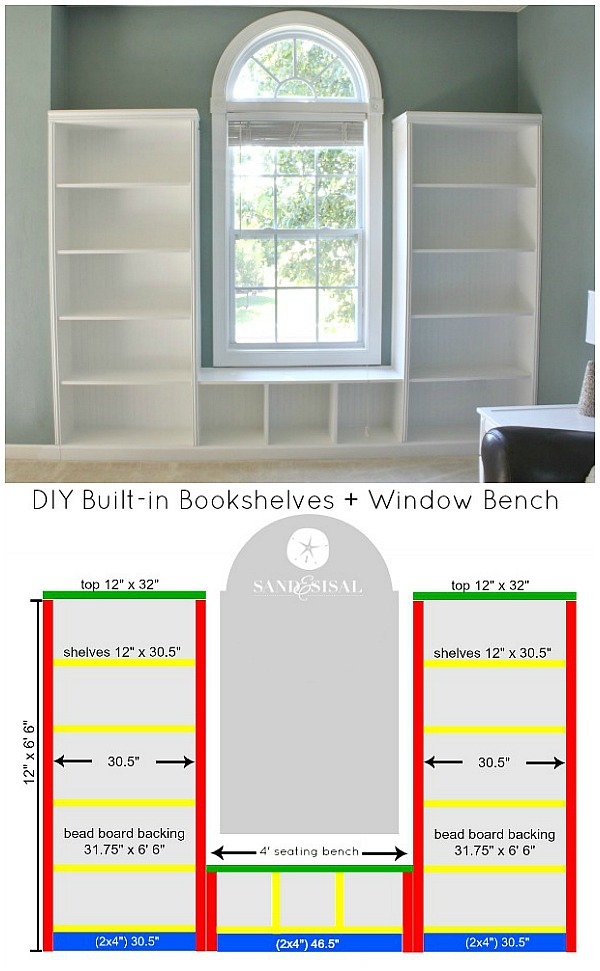
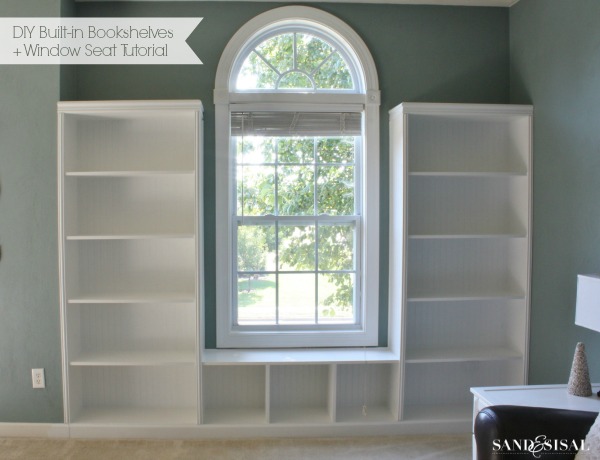
When we moved into our dream home 6 years ago, I saw this odd 11 foot wide bump out in our kids’ playroom and instantly knew what it needed… built-in bookcases! But we can’t afford to pay someone to build those, hubs would say. Grrrr… isn’t that always the case? Well I’m a determined woman and when I want something and can’t afford it, then I will try to do it myself (hence, how this blog started). I finally put my vision into reality and I couldn’t be happier to share with you my tutorial for DIY Built-in Bookshelves + Window Seat with beadboard and rope trim molding!
I’m going to let you know right now. I wish I had the courage to try to build these years ago! They were easier to construct than I thought! I’ve provided you will my exact plans and measurements but you will need to adapt these measurements for your space, because every room dimension is different. Consider these plans as a guideline.
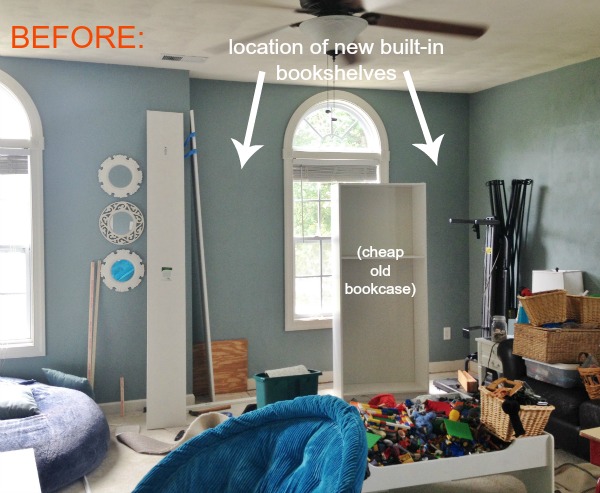
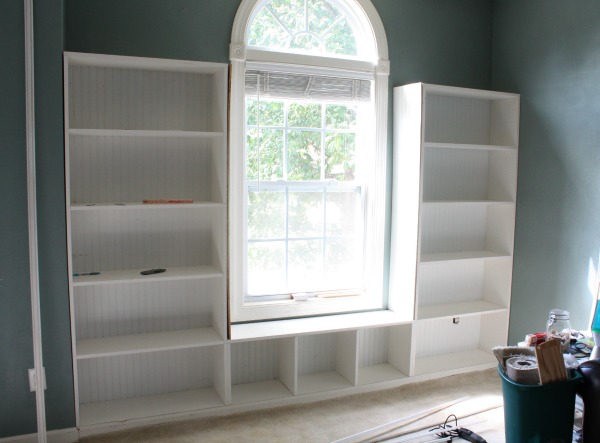
Here’s a peek at the “before pic” of the space where the bookshelves would go (my trashed -messy playroom). We had been using 15 year old, cheap particle board bookcases. They were sagging and chipping and in bad shape.
The first thing we are going to talk about is building the two towers (plans pictured below). Because our room is carpeted, we cut out the carpet where the bookcases would go and carefully removed the existing baseboards. We wanted to take extra care not to damage them since we planned on using the again.

You first need to gather all of your tools and supplies. Having the correct tools will make construction of these built-in bookcases fast and simple.
You will need the following supplies to make DIY Built-in Bookshelves + Window Seat:
- (10 quantity) 12″ x 8 ft. Primed Pine Boards
- (2 quantity) 4 ft x 8 ft beadboard panel board
- (2 quantity) 6 ft long 2 x 4″ lumber
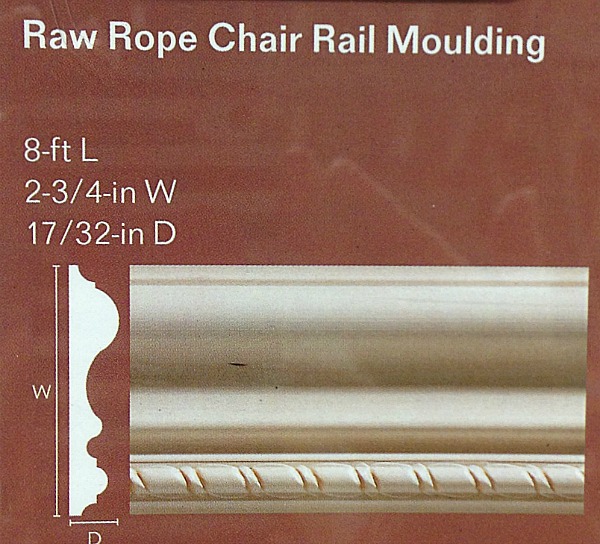
- (2 quantity) 2-3/4″ x 8 ft. rope chair rail moulding
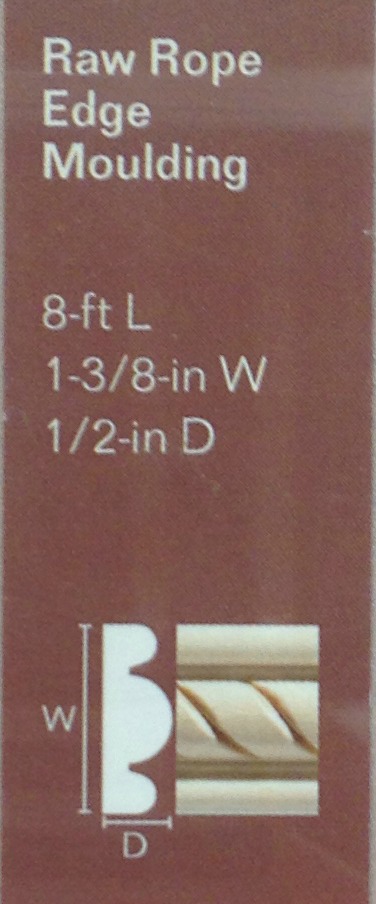
- (4 quantity) 1/2″ x 1-3/8″ x 8 ft. rope edge moulding
- wood shims
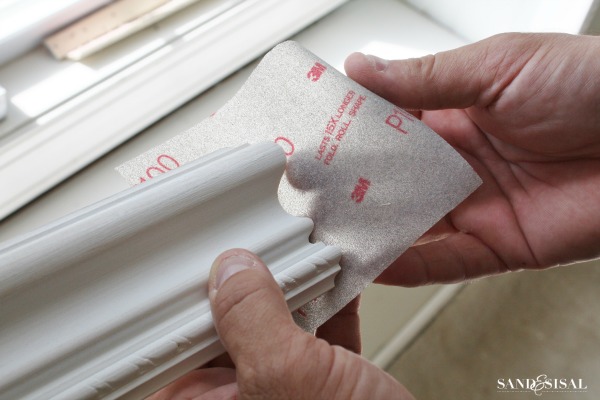
- 3M™ Advanced Abrasives– Ultra Flexible Sanding Sheets
- Paintable caulk
- Primer & Latex Paint
You will need the following Tools and Protective Gear:
- 3M™ Safety Products-Ear Protection (I love their Digital WorkTunes™ Hearing Protector & Disposable Ear Plugs)
- 3M™ Safety Products– Safety Eyewear
- measuring tape + pencil
- a Rafter Square
- Skil® Circular Saw
- Circular Miter Saw or miter box & hand saw
- Nail guns with compressor (a finish nailer & brad nailer)
- 2 inch 16 gauge finish nails & 1- 1/4″ 18 gauge brad nails (for nail guns)
Ready to get your DIY on? Let’s go!
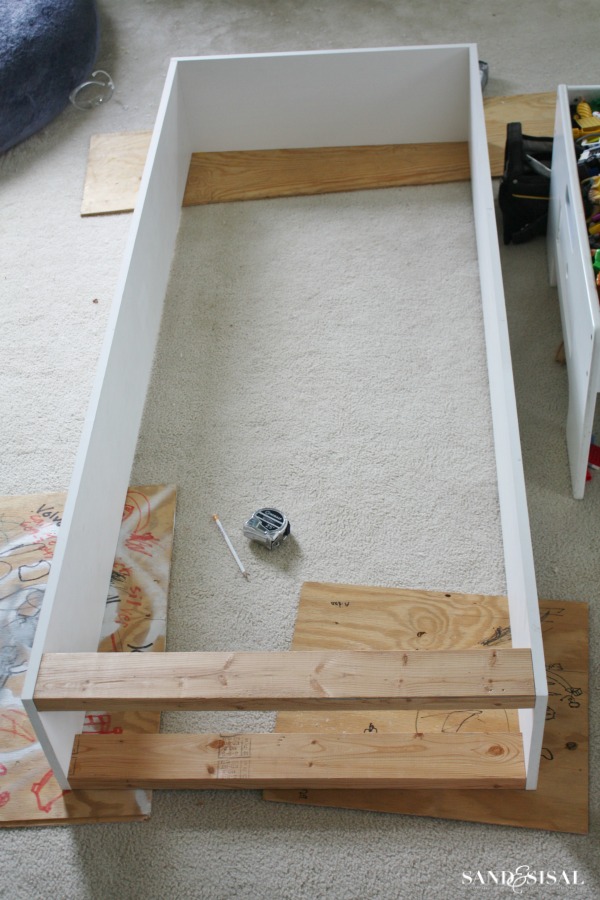
This little lumber stack pictured below is all the lumber you need for one bookcase with out the optional decorative trim (not shown- the bead board backing).

***SAND & SISAL TIP: Before you begin: Place your protective ear wear and safety eyewear on before you start and be sure you are familiar with all the power tools’ manufacturer’s guidelines and safety precautions. Safety is paramount.***
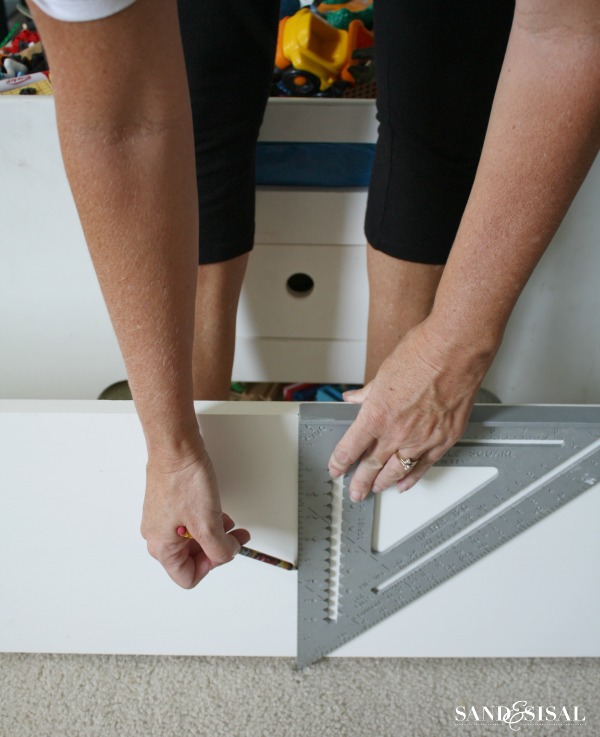
Step 1) Measure. Lay an 8 ft. board on 2 saw horses. Measure the width of the shelves and use a rafter square to mark it with a pencil. Do this for the bookshelf sides also.
SAND & SISAL TIP: Measure, mark and cut only one board at a time. Why? This helps ensure accuracy in measurements.
Step 2) CUT. We are in luck people! We are making all straight cuts with a circular hand saw! Use the rafter square to help keep your saw true and straight. Cut each of your shelves, sides, and 2×4″ bases, and beadboard backings.
SAND & SISAL TIP: Be sure to always place the blade of your saw on the outside edge of your pencil line and have a helper hold the other end of your board. Why? Because the saw blade is about 1/16″ thick and if you cut on the inside of your pencil line then your shelf will be now be 1/16″ short (at least). Trying to achieve accurate cuts is important for easy installation. I marked an “x” with a marker on the outside edge of my Skil® Saw guide plate so I wouldn’t have to always guess. Marking an “x” on the part of board you do not want is helpful too.

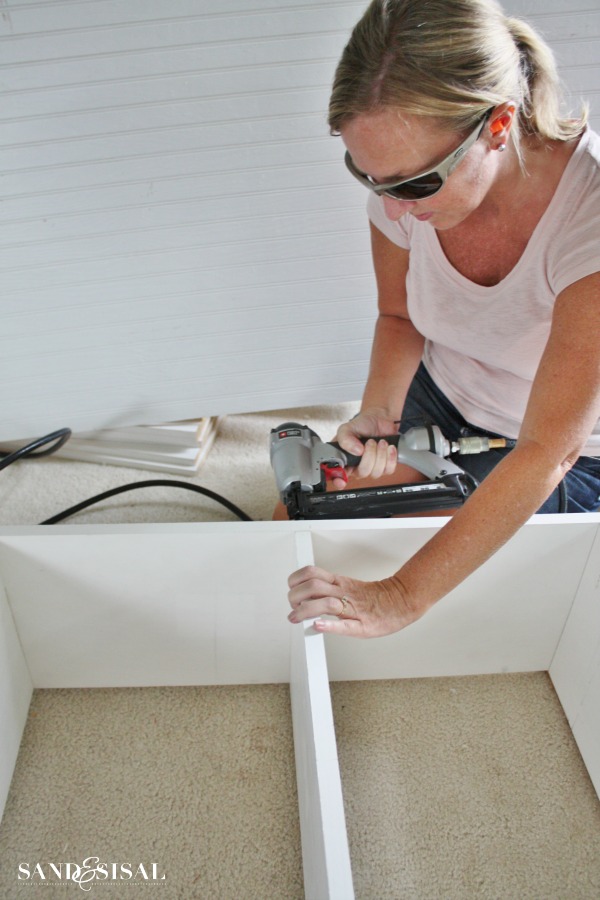
Step 3) Construct the bookshelf. Grab a partner to help you with this part. Now I will admit that building this in the middle of my playroom was convenient, but probably not exactly ideal. You need a large area with a flat surface. I used scrap paneling boards to set my boards on. Prop up the side boards of your bookshelf and place a your cut 2×4″ in between and totally flush on the bottom.
Nail the 2×4 to the side boards with a 2 in. finish nail gun. This is your base, so give be sure to make it secure and sturdy with 2 nails in each end of the 2×4’s. Now nail in the front 2×4. After that, place the top cover to the book shelves over the top of the two side boards. Ensure it is flush with the sides and nail it in from the top with the 1-1/4″ brad nailer. Congrats! You just built a box!
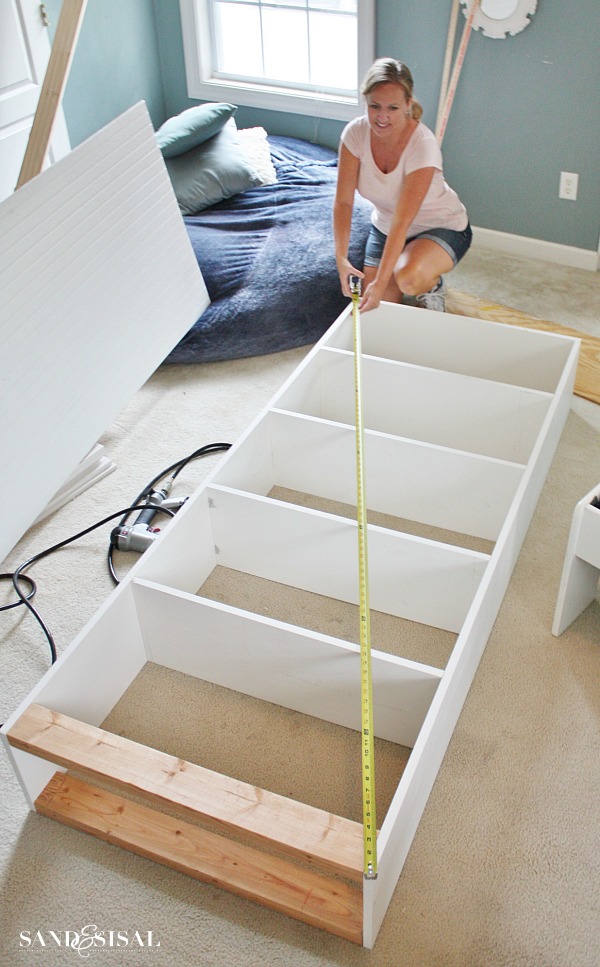
Step 4) Install the shelves. You need to decide for yourself how many shelves you want and how you would like them spaced apart. I chose to space mine approximately 19 inches + apart. Start from the bottom and mark your 1st shelf, repeat with that measurement until you reach the top.
SAND & SISAL TIP: To make sure that your shelves are totally level, use a rafter square to draw a line on BOTH sides (inside and out) of the board where you want the top of the shelf to go.
Step 5) Nail in shelves. Slide in your shelves directly under your pencil marks. It might be tight so use a rubber mallet or hubby’s hand to bang them in place. Once in place then nail the shelves from outside with your brad nailer at least 5 times.
SAND & SISAL TIP: Install all shelves except the bottom shelf. Why? You will want access to the base to anchor it to the wall for safety.
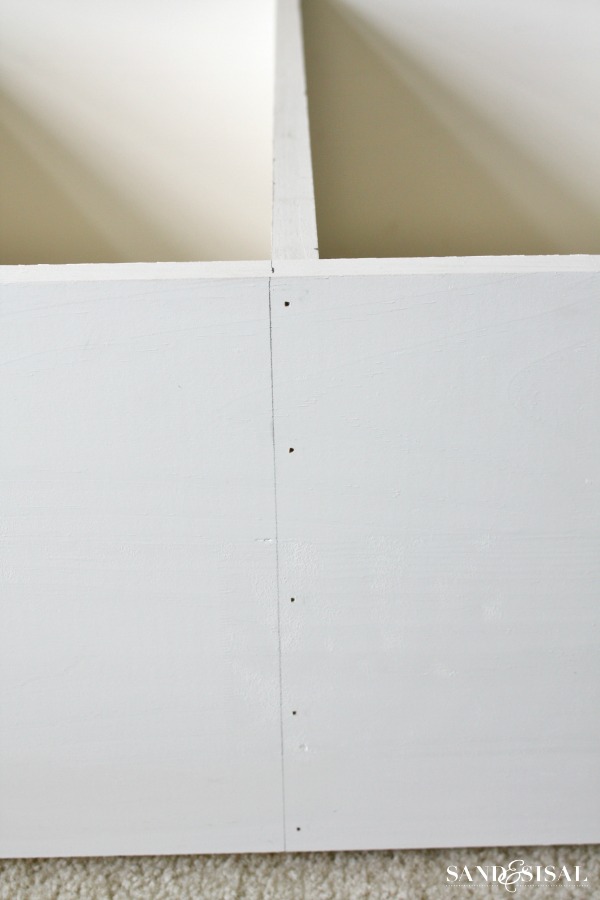
Step 6) Check for square (each corner is a 90 degree angle) first then attach beadboard backing with nail brads.
SAND & SISAL TIP: To “check for square” have your partner hold the bottom of the bookcase securely. Stretch a measuring tape from each bottom corner to the opposite top corner and record the measurements. From the longer measurement top corner, tap it with a rubber mallet or hand towards the shorter measurement corner. Tap and adjust until both corners are equal measurements. Then you can nail in the beadboard backing.
Step 7) Place in desired location. Use a level to make sure the bookcase is standing level horizontally and perpendicular. Use wood shims if necessary to prop up the bookcase to make level (our walls were whack!). Secure the bookcase into wall studs with your 2 in finish nailer. We secured the base in a few areas and the top and upper side panel. After you secure it to the wall then you can place the bottom shelf on the base and nail it in.
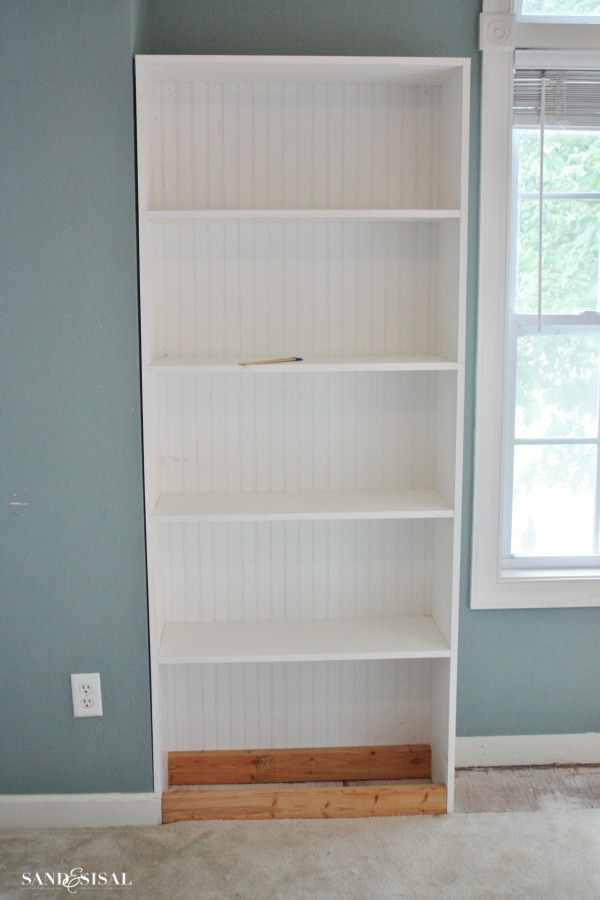
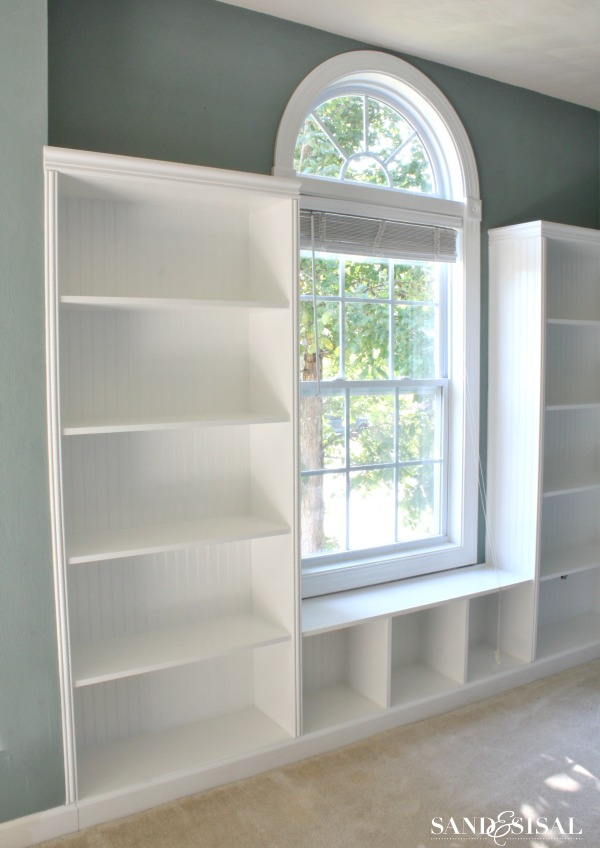
Now that sounds like a lot of information and tips doesn’t it? But I’m telling you, the bookshelves literally took us only 1 hour to make each (without trim)! You repeat the same box creating technique with the window bench (see plan diagram above). Cut and replace the baseboard to the bottom of the bookcase. Voila! You can stop at this point if you want… but a little bit of decorative trim really gives it the total custom, built-in look!
Step 8) Optional- Add more beadboard and decorative trim. We had left over beadboard paneling and decided to add that to the outside panels of the book cases, securing with brad nails.

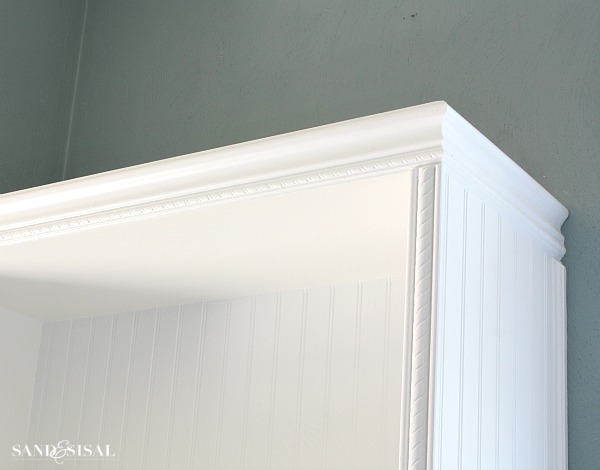
We gave the top of the bookcases a finished appearance with a crown of rope chair rail moulding.
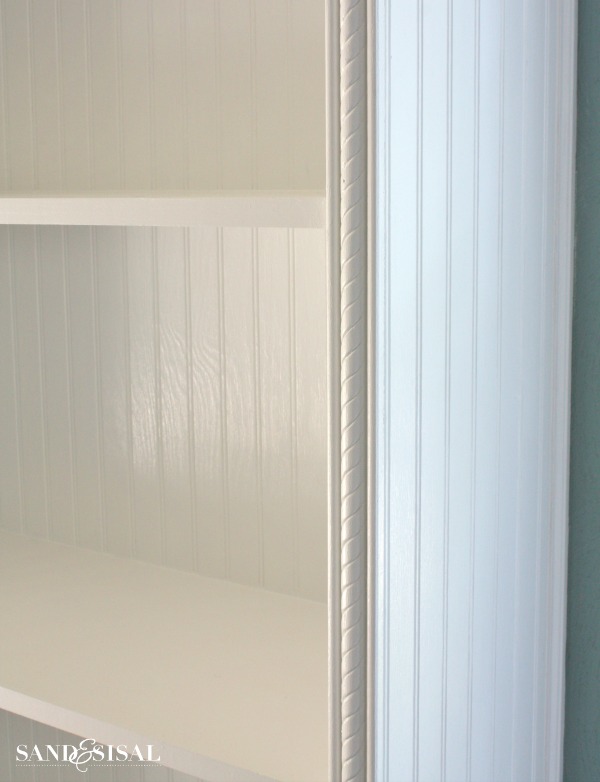
To cover up any gaps between the wall and the bookcase and the front side edges we added rope edge molding. We secured it to the bookcase with the 1-1/4″ brad nails.
Sand off any rough edges with 3M™ Advanced Abrasives new Ultra-Flexible Sandpaper. This sand paper is seriously cool stuff. It folds, rolls, and bends into any shape you might need for sanding.
Caulk all seams with paintable caulk, allow the caulk to dry then give the entire bookcase unit 2 coats of semi-gloss latex paint. The decorative trim molding completely finishes the looks and gives the bookshelves a professional appearance.
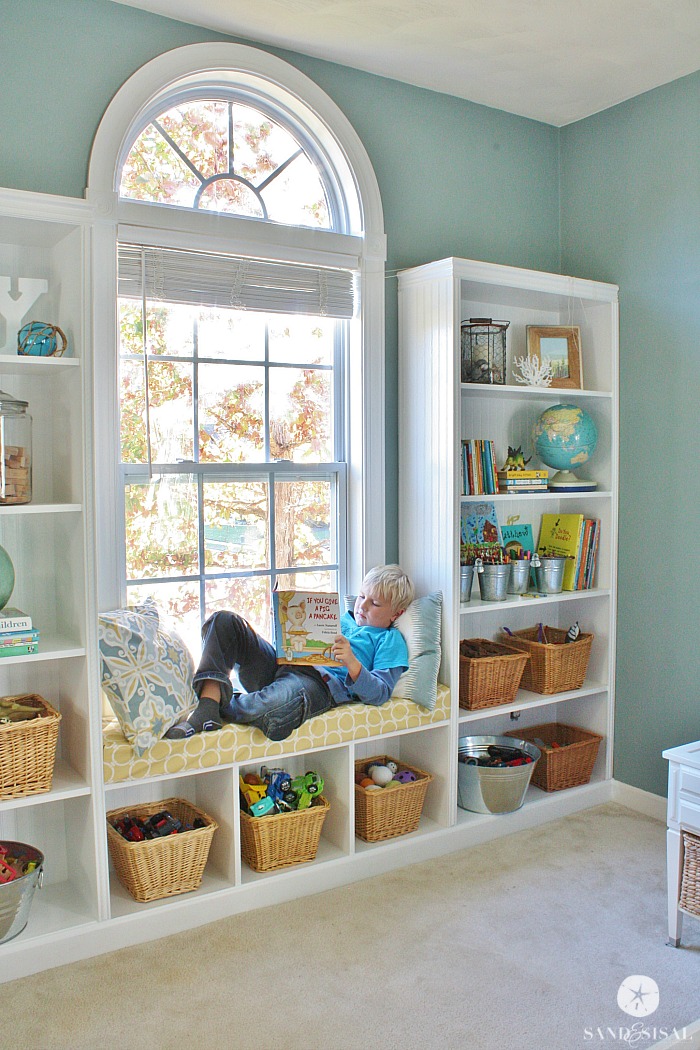
I am so thrilled with how it all came together and can’t wait to show you how I’m going to style the playroom bookshelves and window seat! Stay tuned for that post!
UPDATE: Here is the space all decorated! Click HERE to see all the details!
Happy building!
KIM

For more amazing DIY projects and plans check out:
3M DIY Website
3M DIY
3M DIY Instagram
3M DIY Twitter
3M DIY Facebook
3M DIY Pinterest
I am proud to be a 3M- sponsored blogger, and, as part of my responsibilities, I get the opportunity to evaluate products from 3M DIY. Opinions are my own and additional product used in the project were selected by me.
Original article and pictures take www.sandandsisal.com site
Комментариев нет:
Отправить комментарий