I’m trying to act cool and chill about the fact that I’m FINALLY posting my six-months-in-the-making over-promised laundry room reveal, but inside, whole parts of my brain are in various stages of explosion.
Because look what happened to my laundry room! Here’s how it looked when we moved in:
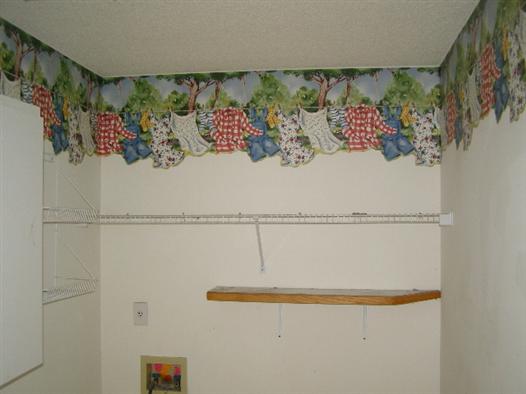
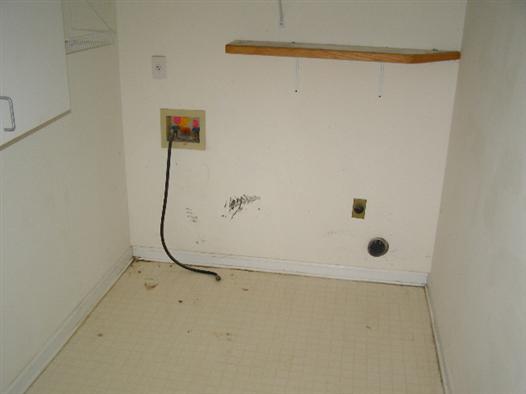
That clothesline border helpfully clarified the purpose of the room, in case we ever got confused.
Right after we moved in, we slapped a coat of paint on the wall, removed the popcorn ceilings, and left it that way, until last summer.
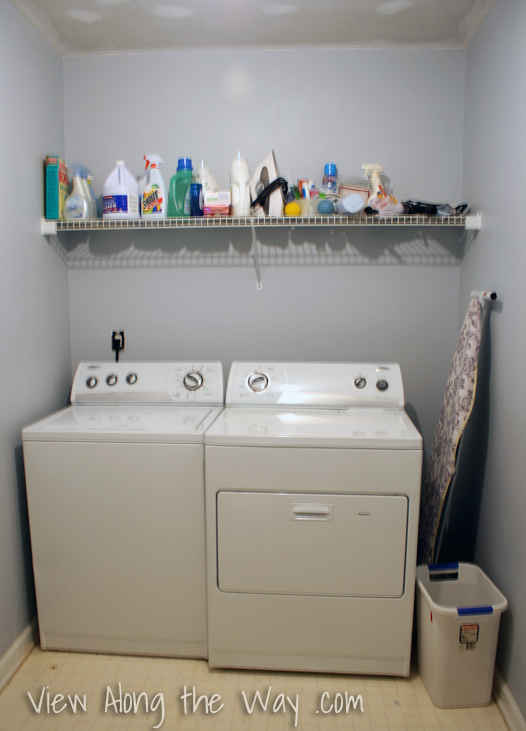
And today, it looks like this:
I mean whatever. No biggie. *Casual shrug.*
*Simultaneous happiness explosion. Smoke coming from ears.*
It’s SO MUCH MORE FUNCTIONAL.
Our goals for this room were:
- Pretty it up.
- Fix the storage problem. (The single wire shelf was not doing the job.)
- De-grossify (real word) the flooring.
- Create a DIY drying rack.
And we hoped to do it all for $100 total.
Goal one: Pretty it up
I’m the only one who uses the laundry room, so for the first time ever, I sat down and considered the kind of room where I want to live. NOT what’s trendy. NOT what’s in style. Just what makes me happy, even if posting this on the blog caused whole interwebs to collectively point, laugh and shun me forever. (A little inspiration to help you do the same in this post.)
I will admit I’d prefer to avoid the collective shunning.
I decided these things make me do a happy little jig:
- Teal
- Wide horizontal stripes
- Sparkle and bling
The sparkle didn’t so much make it in the end result, but you can see where the other two ideas did:
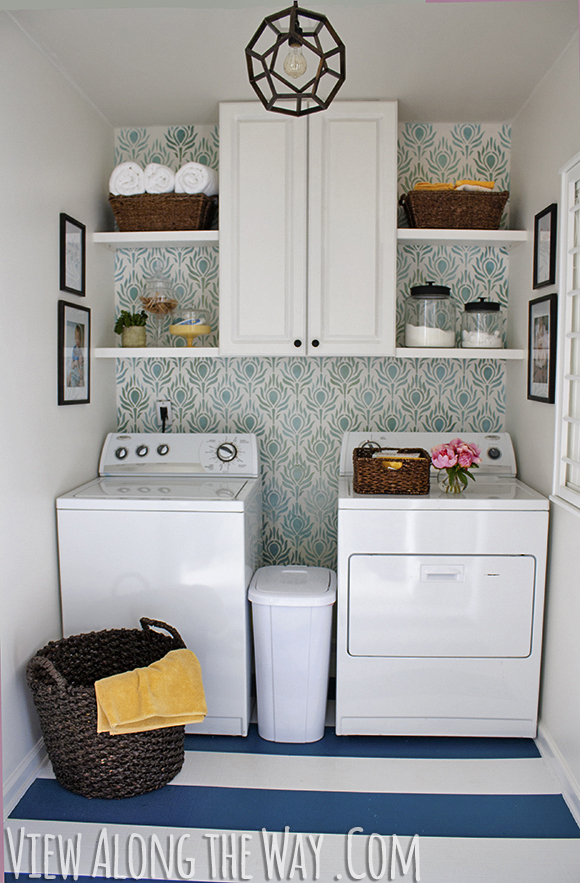
Little note: In some of these pics, the walls look bowed or the room looks a little fish-eyed and distorted. It’s just a weird thing our camera did as a result of trying to take pics of a tiny room.
First, we cleared the room and slapped a fresh coat of Benjamin Moore Atrium White on the walls and Benjamin Moore Butter Pecan on the ceiling.
Then, I stenciled. Day and night, night and day for many moons did I stencil. (Or maybe it just felt like that.) Here are all the details on the stenciling, including a few lessons learned from this newbie stenciler. And RIGHT NOW there’s a giveaway too so you can win your own stencil free. Check it yall!)
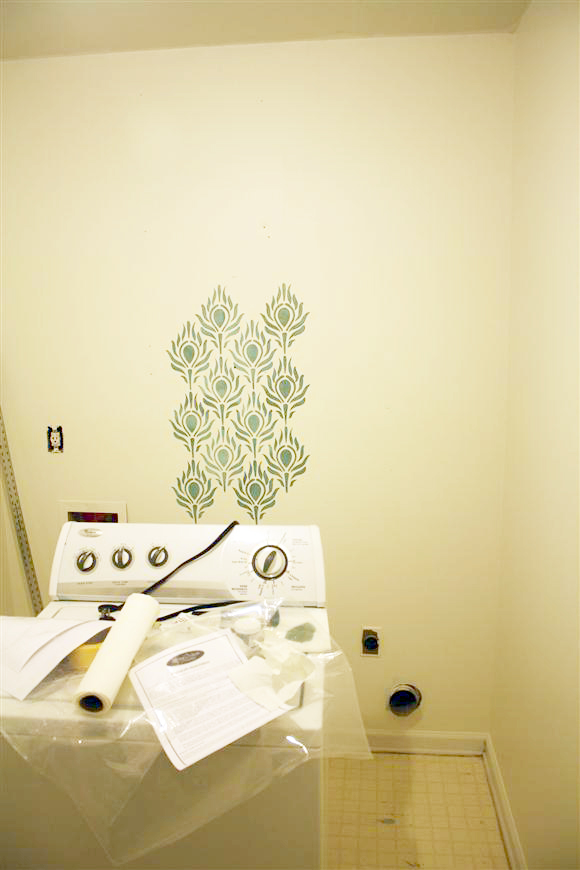
Goal 2: Fix the storage problem
Once that whole wall was done and I’d moved past the persistent nightmares in which some twisted person forced me at gunpoint to re-stencil the wall again, it was time to add cabinetry. We found this cabinet at a yard sale for only $20.
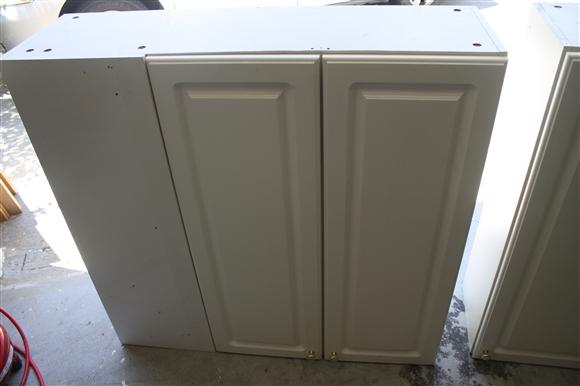
Buying a new one would’ve blown our budget completely, so we were happy to snatch this guy up. It was originally a corner piece, but Andy worked his magic on it to remove that weird corner section and add a new side. (See that post here.) We peeled the cracked laminate off the cabinet doors and repainted them white. Finally, we sprayed some oil-rubbed bronze spray paint on those shiny golden knobs. Then Andy hung up the cabinet. RIGHT on top of all that stencil work. The nerve!
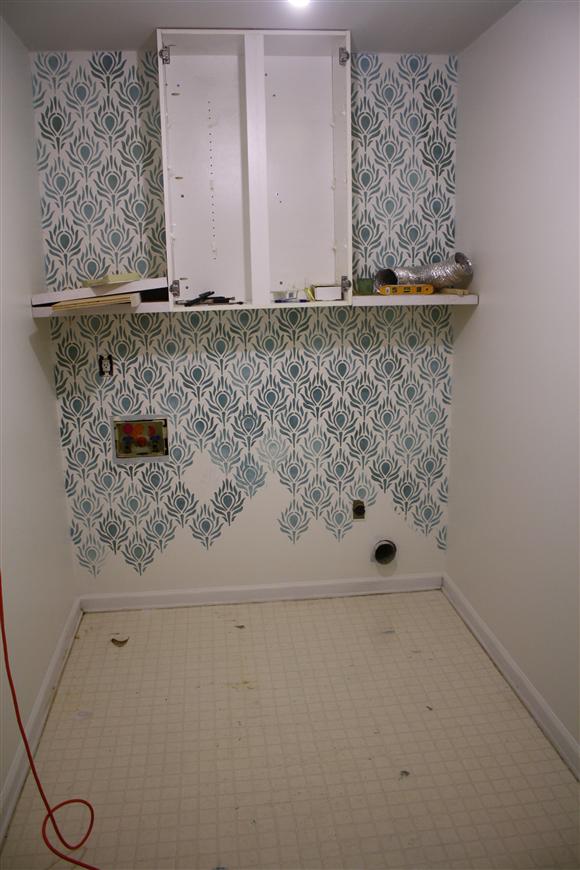
Okay, I forgive him. He also built and installed shelves on either side of the cabinet using scrap wood and his trusty kreg jig.
At this point, I had STORAGE. I was so happy to have a place to put my starch that I’d often go missing for several hours, then be found standing in the door of the laundry room, smiling and sighing blissfully. My life felt complete. But we still had another goal to attack.
Goal 3: Un-nastify (yep) those floors
The floors were an ugly vinyl that never looked clean no matter how much we scrubbed.
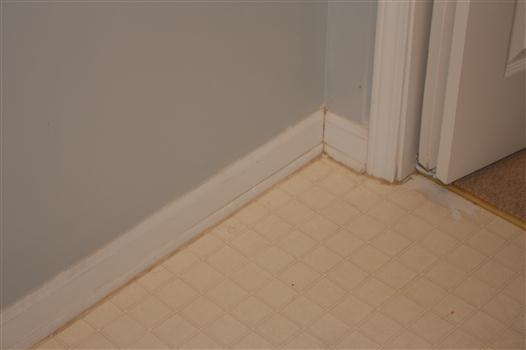
To stay on budget, we’d planned to spend no more than $1 a square foot on the floors. In this post, I shared our options for redoing vinyl floors on a budget. The riskiest option – but most exciting for us DIYers-at-heart – was paint. We didn’t know anyone who’d ever tried painting vinyl floors, and the guy in the paint section at the hardware store expressed his concern about this wacky idea (and our sanity) but we could not be dissuaded by “facts” and “expertise.”
I’m thrilled to report that it worked! (Score one for impulsivity!) Here’s the full tutorial for how to paint your dated vinyl floors.
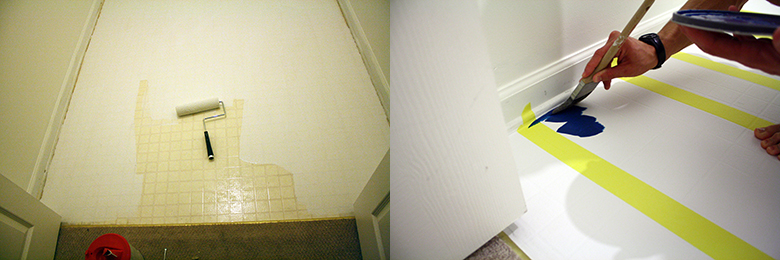
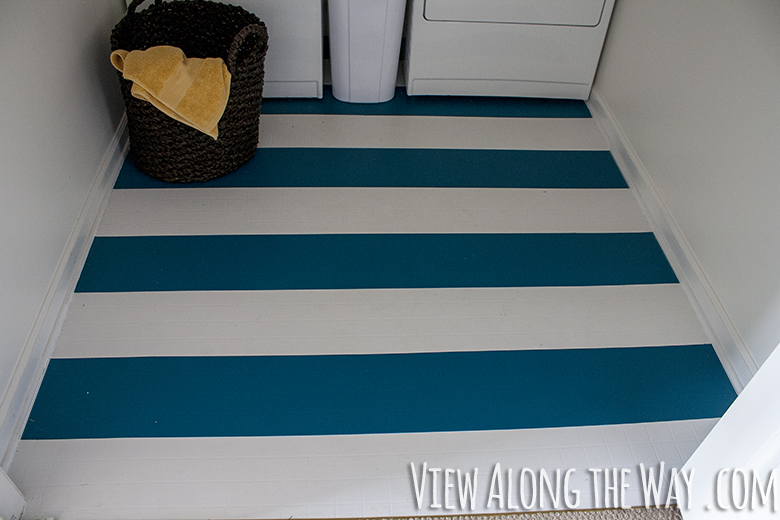
We’ve had these floors painted for about five months now and they’re holding up perfectly. At first, like those people who buy nice furniture and then cover it in plastic, we were hesitant to actually use the floors. We were afraid to get them wet in case the water made the paint bleed, and afraid to vacuum or put laundry baskets on them in case the paint scratched, but they turned out to be SUPER durable despite lots of action from our feet, vacuum, baskets and children. More on that soon!
Goal 4: Make a DIY Drying Rack
This goal was a fail-slash-win. We’d planned to build our own because the manufactured drying racks always seemed to be priced as if they’re built from the hides of majestic unicorns. Then one day while I was shopping the Ballard’s Backroom Outlet, the clouds parted and the sun shone upon a pile of their drying racks. They all had slight damage, but they were marked down about 90 percent off – only $25! – so I went for it. The beadboard backing on my drying rack is slightly bent, but it’s virtually invisible. (They must’ve built my drying rack out of a defective unicorn.)
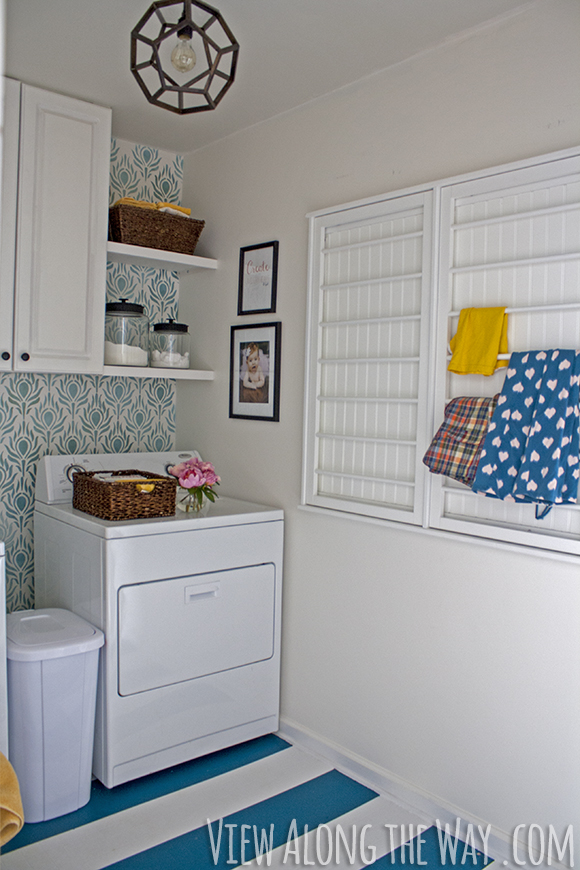
And that little hunk-a-wood has changed my life. We use it almost constantly to dry Mila’s cloth diapers.
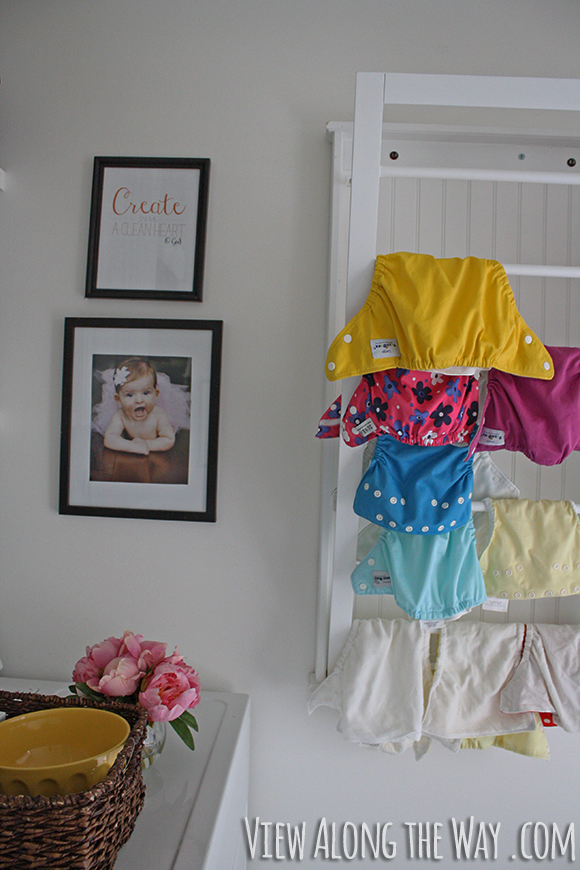
Now it was time for the fun part: putting the room back together!
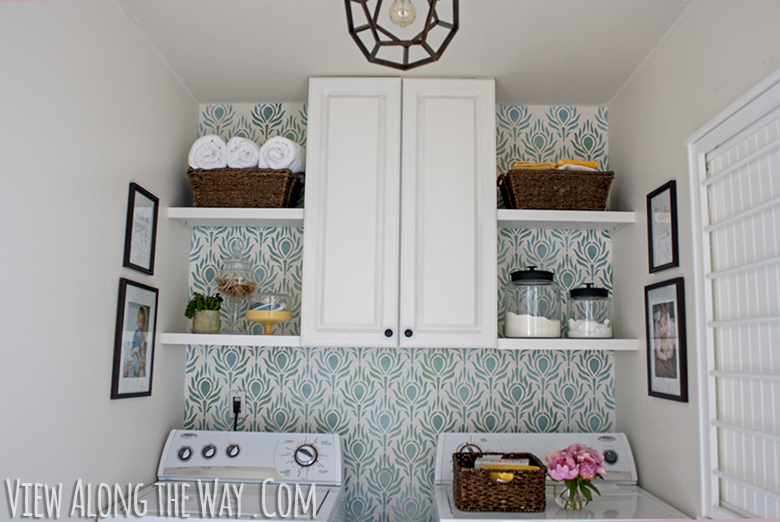
I filled that cabinet with all my laundry junk: iron and various sprays, brews, concoctions and poisons.
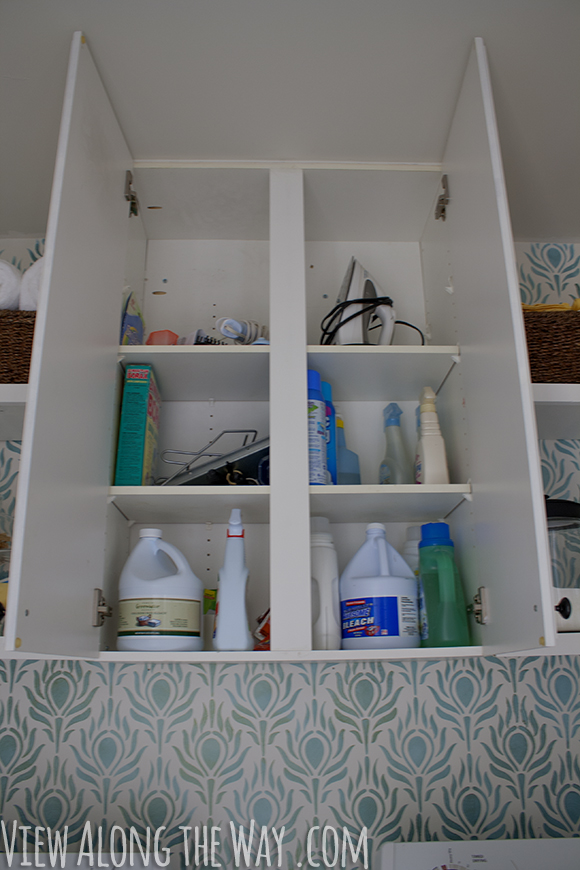
On one side of the shelves, I popped all my travel-size and sample-size detergents in that sweet yellow plate and cloche. The apothecary jar holds clothespins and I dropped in a little pot-o-succulents to add some life. I’m using the baskets on top for extra towels and linens.
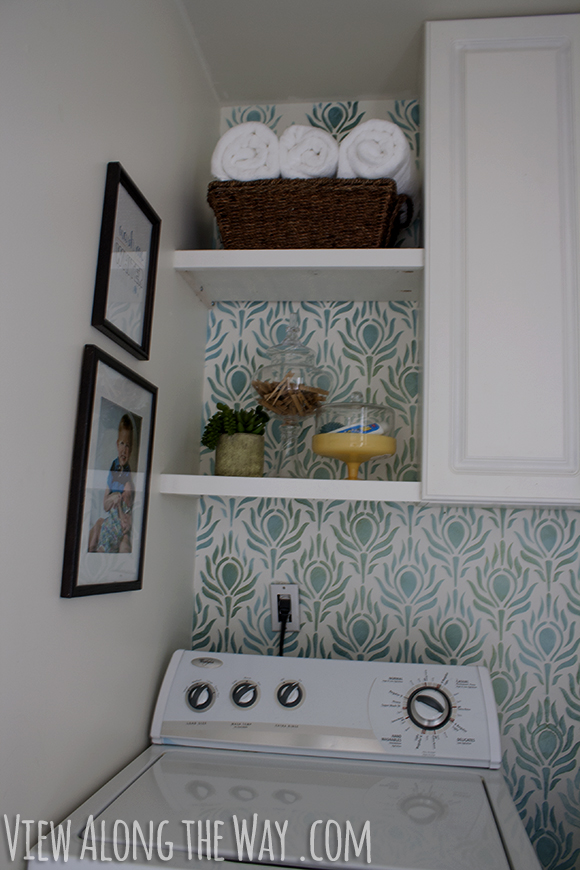
On the other side, I’m storing my detergents in pretty glass jars, because it makes doing laundry feel fancy, like I’m scooping piles of gummy worms and chocolate sno-caps from those candy-by-the-pound stores. The larger jar holds our clothes detergent and the smaller one holds the special detergent we use for our cloth diapers.
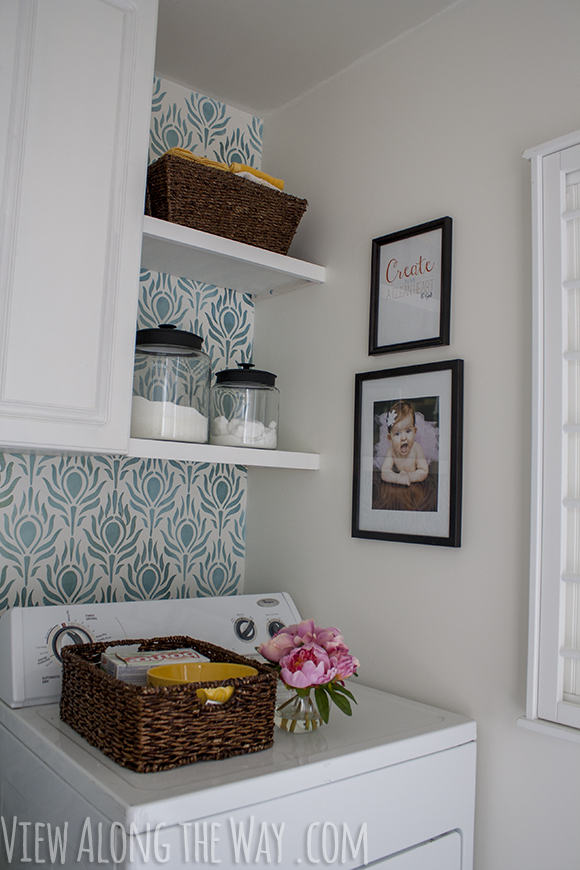
A while back I showed you how I found those yard sale picture frames and spray-painted them, then added some pics of my sweet babes and a couple of DIY cleanliness-related Bible verse printables I made. (You can download them free here.)
All spare change I collect from the pockets of jeans goes in that yellow bowl, which lives beside our dryer sheets in a tidy little wicker tray.
And here is a universal life truth: you could plop a few pink peonies on an old crusty toilet and it would instantly look beautiful.
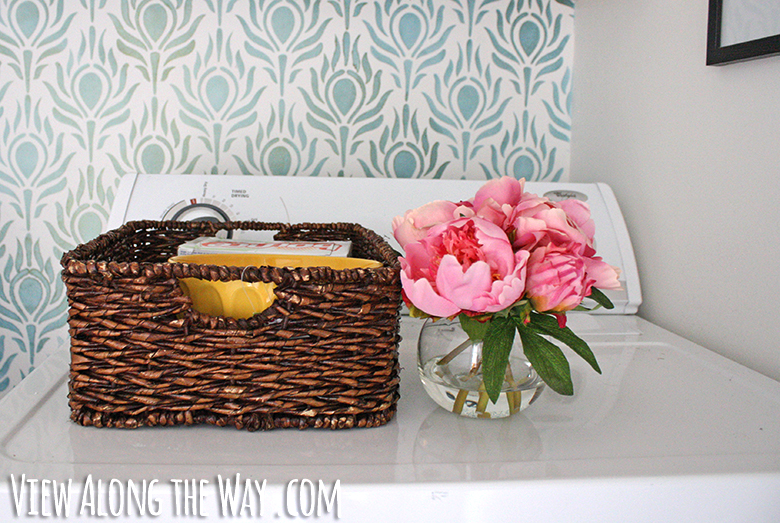
But why are we talking about dryer sheets when we haven’t even mentioned *THAT LIGHT.*
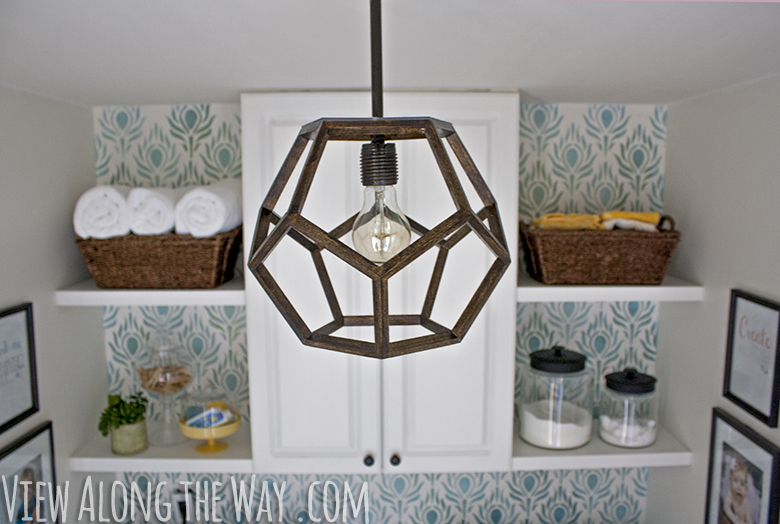
That is the very dodecahedron light I challenged my brilliant husband to make and he DID it. Without breakin’ a sweat. It’s our DIY version of the Ralph Lauren Dustin pendant which costs $440 for the small version. You can see how we made it, and how you can have your own, right here!
I am madly, deeply in love. Every time I look at it, I feel giddy-happy.
And also? It cost us about $10. (And a lot of hours.)
Andy proclaims it to be his best work yet, and that kid has made some pretty amazing things in his time. *Happy sigh.* (Click here for the details on the light!)
The wall on the left is still empty for now. Eventually we want to add some kind of ironing board storage – right now the ironing board is propped up against the wall in the master bedroom – and some hooks for clothes hangers, but I can’t tell you how much more useful and comfortable this room has become already. It’s a happy place.
Now let’s see how we did on cost!
Painting the Floors
- 2 gallons of porch and floor paint: ~$55
- TSP cleaner: $7
- Sandpaper, paint brushes and rollers, painter’s tape: Already had on hand.
- Total: $62
Dodecahedron Light
- 8-foot piece of poplar: Had on hand (normal cost is about $7)
- Stain and poly: Had on hand
- Small piece of acrylic to hang it: $5-10
- Pendant hardware: Hacked a pendant we bought at a yard sale for $3
- Total: ~$10 (!!)
On the walls:
- Paint: One gallon of wall paint: $25. (Trim and ceiling paint were leftover from the rest of the house.)
- Stencil and stencil creme: Stencil creme was a prize from the Haven conference and stencil was given to me by Royal Design Studio. (They’re giving one away to you too right here on Thursday. Be there.)
- Cabinet: $20
- Shelves: Built out of scrap wood we already had.
- Drying rack: $25
- Art: Four frames, mats and prints: $15
- Total: $85
Total cost for this room: $157
We went over budget by $57, but I’ll call that a raging success. That light alone would’ve been $440 new!
And just ’cause we can, let’s do a before-and-after one more time, shall we?
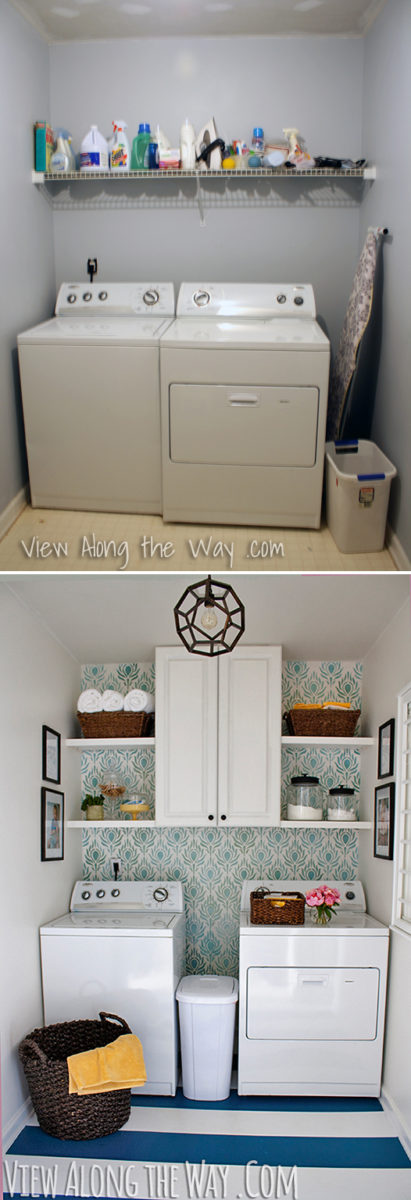
(Yay!)
Did you think this room would ever be finished? I’ve been teasing it for months. Have you ever redone a laundry room? Is there anything better than having a finished room? (I submit to you that there is not.)
P.S. Just click right on over here for more room makeovers!
This post contains affiliate links.
Original article and pictures take www.viewalongtheway.com site
Комментариев нет:
Отправить комментарий