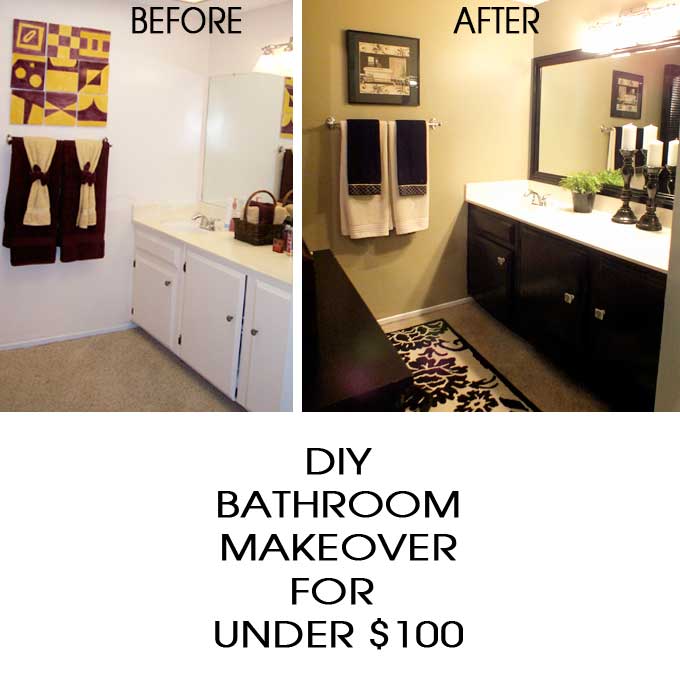
As you can see, my circa 1970’s builder-grade bathroom was in desperate need of a makeover but I didn’t have the thousands of dollars that it would take for a remodel. I desperately wanted a more modern look and wondered what exactly I could do for the least amount of money possible and with my meager home improvement skills. I decided to throw caution to the wind and see what could be accomplished with some paint and window casing trim. I spent $100 and it took one weekend and it is by far the most successful small budget decorating project I have ever done!

How to do a DIY Bathroom Makeover for Under $100:
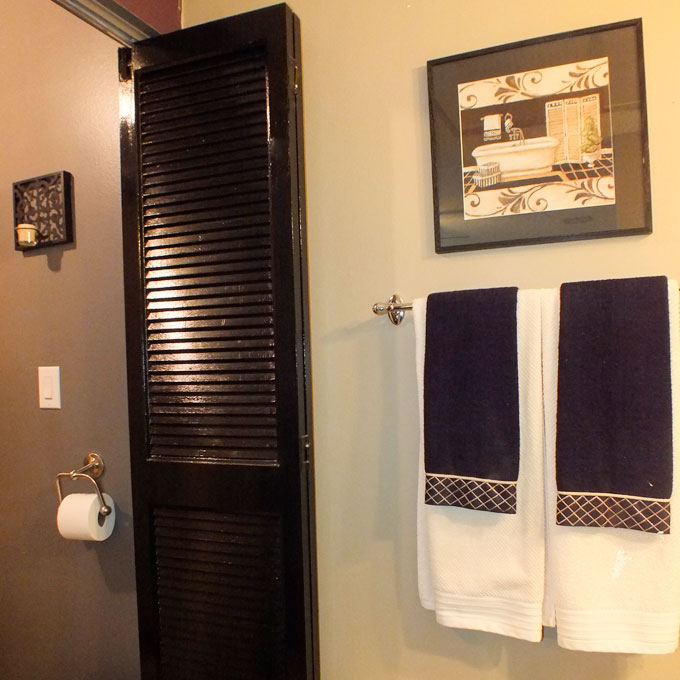
As you can see here in this detailed picture a makeover was definitely needed. My first step was to assess the positives. The cabinets were fine but the builder’s grade white paint had to go. The mirror was old fashioned but it was glued to the wall and couldn’t be removed without ruining the drywall so that would have to stay. The counter top is actually nice, so no change was needed there. The walls needed to be painted. The medicine cabinet was old and atrocious and had to be replaced! (That would be my biggest expense.) The door to the shower/toilet area was an out-of-date, white-slated louvered door (shown in the picture above on the left). I had no idea how to replace that so I would have to spruce it up instead.
I spent less than $100. Here is what I bought:
- Wall Paint – $0.00 (I used left-over paint – Behr Gobi Desert – from my living room painting project)
- Cabinet/Door Paint – $13.96 (1 Quart Behr Premium Plus High Gloss Black paint)
- Cabinet Door Handles – $10.00 ($4.99 each but 50% off at Hobby Lobby)
- New Medicine Cabinet – $49.00 (Glacier Bay Recessed Medicine Cabinet from Home Depot)
- Mirror Trim – $15.00 (Window casing trim from Home Depot)
- Liquid Nails – $6.00

Painting the Cabinets
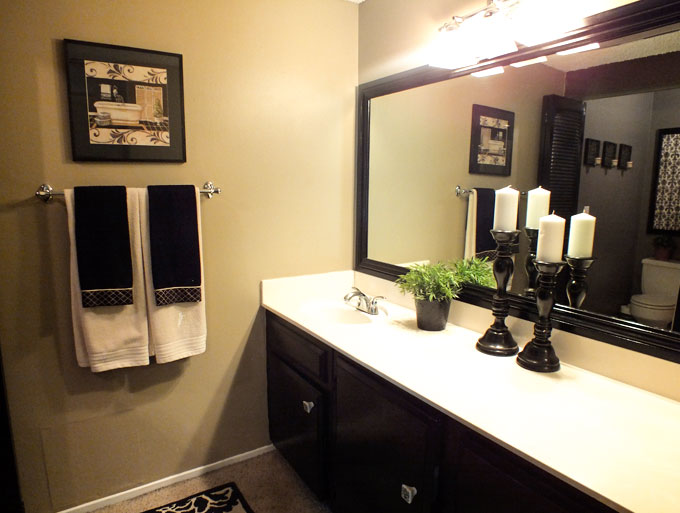
I really went back and forth on the idea of painting the cabinet. It had been drummed into my head that you should never paint wood so I was worried about how it would turn out. But this was hardly top of the line wood cabinetry so I decided to go for it. Next question: what color? I considered going bold with bright color of some kind but I was afraid that I would get sick of it and then be stuck with blue cabinets. So I decided on black. When I was at Home Depot, I made a last minute decision to go with High Gloss. I’m so glad I did. The gloss really hid the imperfections in the cabinet. I picked Behr Premium Plus High Gloss paint and a little went a long way. I was able to paint the cabinets, the door, the medicine cabinet and the mirror trim with one quart of paint. I only used one coat of paint along with some strategic touch ups. I recommend using a good quality paint brush, which I had invested in previously. It helps cut down on the visibility of the brush strokes, especially with a high gloss paint. I painted the cabinet trim and the inside and outside of the doors but not inside the cabinet. It took me a couple of hours to do this.

Cabinet Door Knobs:
I found these pretty ceramic painted door knobs at Hobby Lobby. There were only $4.99 each but they were on sale for 50% off. They were the deal of the century and look so pretty against the painted cabinet doors.

New Medicine Cabinet:
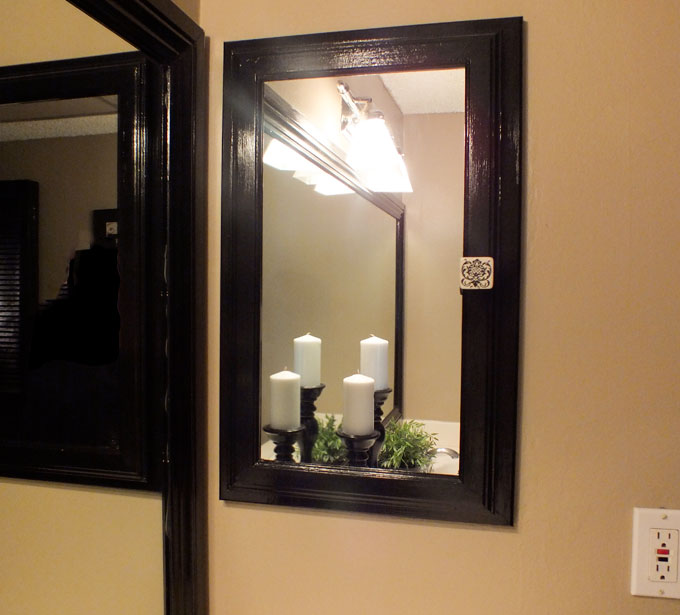
I removed the old medicine cabinet and bought a new one at Home Depot for $49.00. I knew I wouldn’t be able to match anything to the newly painted cabinet so I bought a white one and painted it with the High Gloss black paint. It didn’t have a handle, so I drilled a hole it is so I could add a matching door knob.

Mirror Makeover:
Since this mirror was apparently sealed to the wall for life I needed an idea to update it instead of removing it. I thought that if I could add some trim around the edge of the mirror I could turn it into a more modern “framed mirror” look. I had no idea how to create mitered edges and the only saw I have is a little hand jig saw. But luckily you can get the nice Home Depot people to help you cut your wood trim at the store before you buy it. I looked up directions on how to measure for mitered edges on the internet. Then I measured the mirror approximately 100 times to make sure I had the exact measurements. A super nice man at Home Depot help me cut the four pieces of trim into the correct lengths and I made the mitered edges at home with a compass and MY HAND JIG SAW!! I painted the trim with the black high gloss paint. Then I put Liquid Nails on the back of the trim and glued the pieces to the mirror.

It turned out really pretty. And made all the difference in the world in modernizing that old plain mirror.

Finally, I had to do something with this louvered door. I decided to paint it instead of replacing it. This took most of the second day of the project. It was a very exacting job to cover all the slats with the black paint and to avoid drips. Much patience was required!

Finally I pulled in some accessories from other places in the house. The rug was originally in my hallway, I got it at Target. The towels I already had. The candlesticks were originally in my living room. And I moved an old black bookcase into the room (you can see it in the picture above on the left) to hold baskets and towels. I am very proud of this DIY bathroom makeover. Nowhere else in my house have I achieved such a dramatic impact and change for so little money (and relatively little effort!) If you have a bathroom with those builder-grade cabinets – I say go for it! Paint away!!!

Original article and pictures take www.twosisterscrafting.com site
Комментариев нет:
Отправить комментарий